In short: after buying a domain on Namecheap, add it under your Vercel project's Settings → Domains, create the records Vercel shows in Namecheap's Advanced DNS, wait a few minutes for Vercel to verify them, and the HTTPS certificate is issued automatically.
- Search for and buy the domain on Namecheap (watch the renewal price)
- In Vercel, add the domain under Settings → Domains
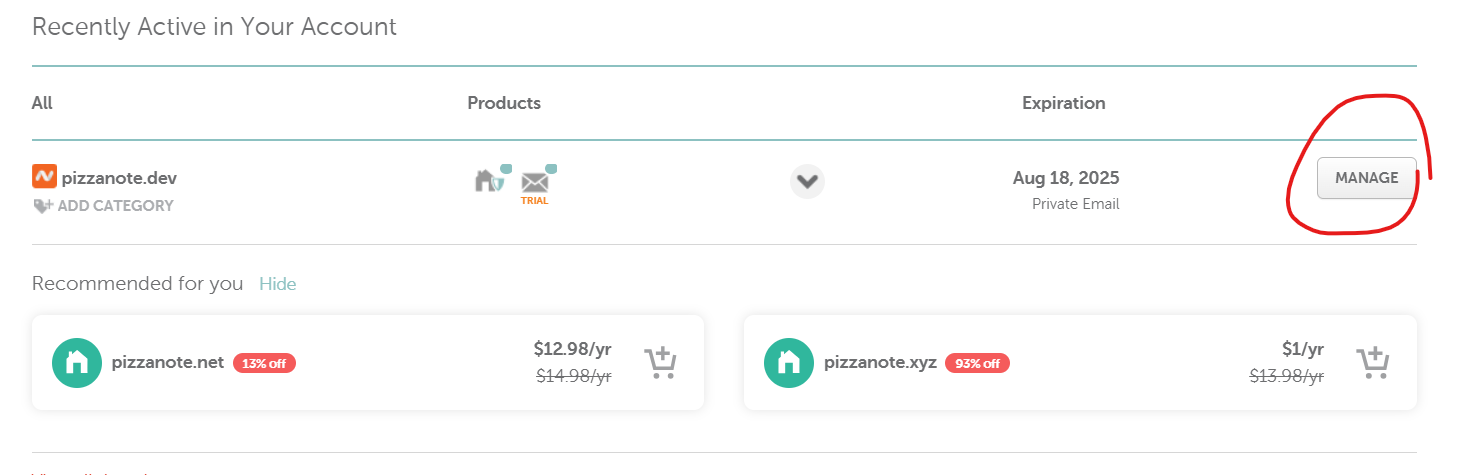
- Back in Namecheap: Domain List → Manage → Advanced DNS
- Add the records Vercel asks for (an A record for the root domain, a CNAME for
www) - Click Refresh in Vercel; when it shows Valid Configuration, you're done
Namecheap
Of the many registrars that sell and manage domains, two are particularly well known:
A big reason I chose Namecheap is the price (the name literally says cheap). Cheap and generous matters a lot when you're a student XD
Beyond the lower price, it also includes free privacy protection (your personal details don't show up in WHOIS). The one downside is that there's no Chinese-language service and the whole interface is in English, but I'm sure that's no problem for an engineer. The whole process is about as easy as shopping online.
Checking domain prices
If you already have a domain in mind, you can search for it right on the home page.
Say you really like pineapples:
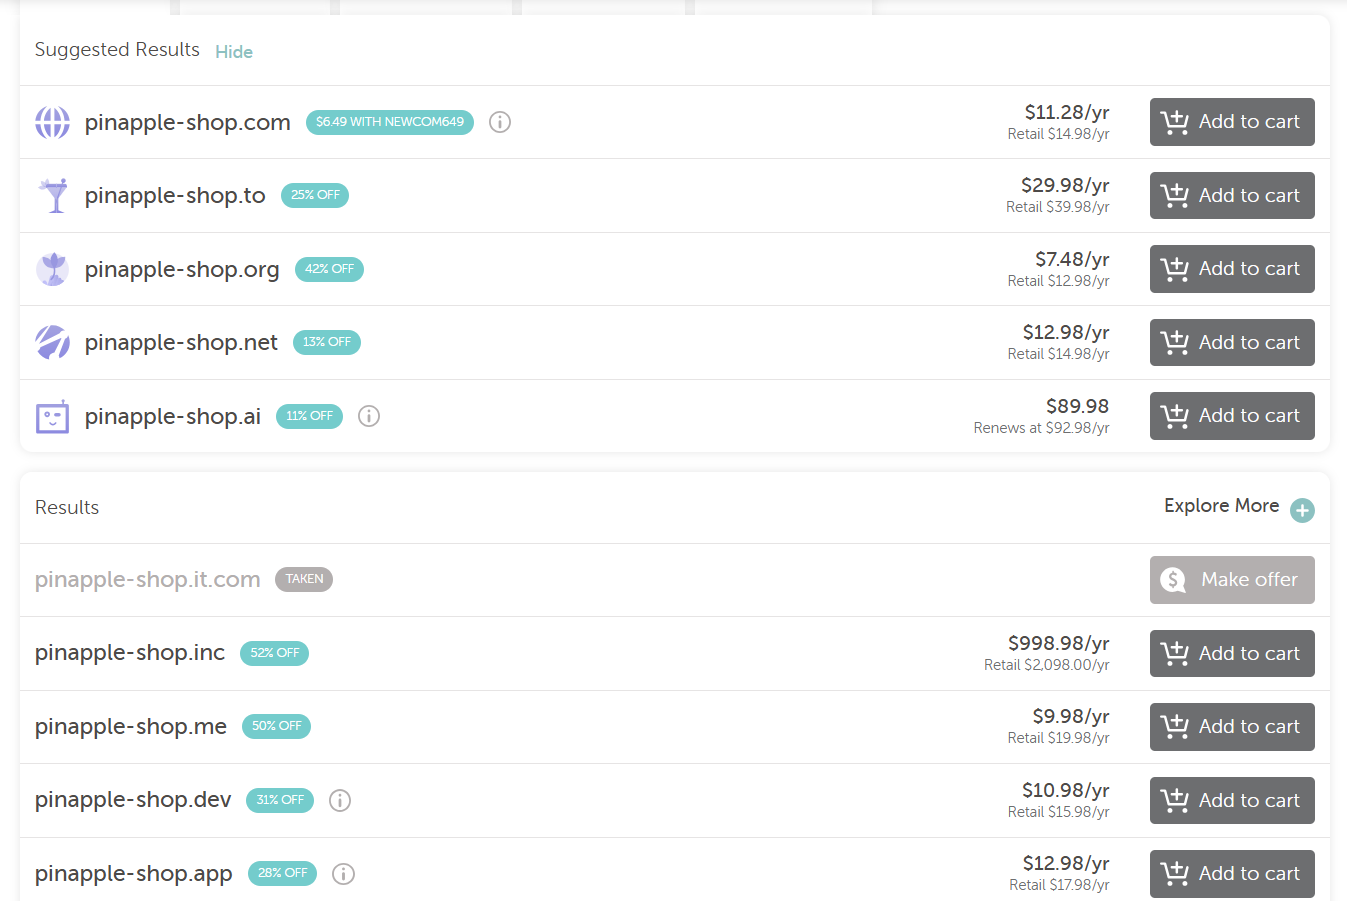
Domains are billed per year. What surprised me at first is that prices are fairly similar across the board; only domains with an obvious symbolic value get really expensive. Of course, the price can climb steeply for a number of reasons, for example:
- Name length (shorter is pricier): x.com
- The price it last sold for (resale value)
- Symbolic meaning (the more direct and concise, the pricier): apple.com
- The top-level domain (.com, .ai)
- Tech trends (buy early, sell high): ai.com
In plain terms, it's mostly brand value. If you're curious, look up what some of those domains sold for.
Pay attention to the Retail price shown under each product. That's what you'll pay to renew after the first year. If you plan to keep the domain, factor it in: first-year promotions are generous, and the renewal price can be two or three times higher.
Note:
.devand.appdomains require HTTPS (browsers always connect over https). On Vercel that's handled for you, because the certificate is automatic.
Buying & creating an account
When you find a domain you like, add it to the cart. You'll be offered a number of add-ons; unless you know exactly what one is for, skip it. Whether you need an SSL certificate depends on your platform and needs. In my case, Vercel takes care of the SSL certificate when you deploy, so there's no need to buy one here.
With an SSL certificate your site can be served over HTTPS. Without HTTPS, browsers such as Chrome show a "Not secure" warning. That drives visitors away, lowers time on site and engagement, and indirectly hurts SEO.
At checkout you'll create an account and enter personal details. The form is tedious, but please fill in real information. Registrars verify registrants strictly, a domain is an important asset (property) for any company, and false details can get it suspended.
Not sure how to write your first and last name in English? Check Taiwan's passport romanization.
After logging in, continue to payment. Namecheap offers three payment methods; without PayPal you can pay by credit card. You'll be asked whether to enable auto-renew. Tick it if you don't want the service to lapse and have to buy the domain again. Double-check the domain name before paying, so you don't end up needing a refund.
Configuring DNS records
There are two ways to connect the domain to Vercel. Pick one:
| Option 1: add records at Namecheap (used in this post) | Option 2: switch nameservers to Vercel DNS | |
|---|---|---|
| Where | Namecheap's Advanced DNS | Namecheap's Domain → Nameservers, choose Custom DNS |
| What you enter | An A record and a CNAME record | ns1.vercel-dns.com, ns2.vercel-dns.com |
| Later DNS records | Still managed at Namecheap | All managed in Vercel |
| Best when | You need other records at Namecheap (email, Search Console verification) | The domain is only used for this Vercel project |
Option 1: add A and CNAME records
In your Vercel project, go to Settings → Domains, click Add Domain and enter your domain. Vercel lists the DNS records it needs:
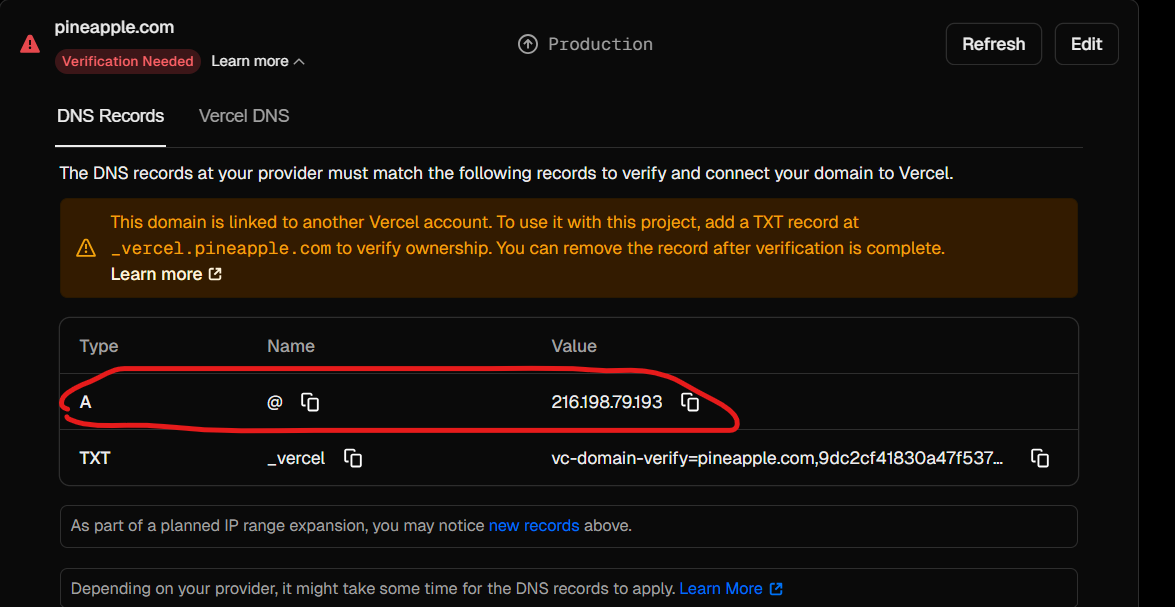
Copy the values, go back to Namecheap, open Account → Dashboard to see your domains, click Manage, and add the records under Advanced DNS:
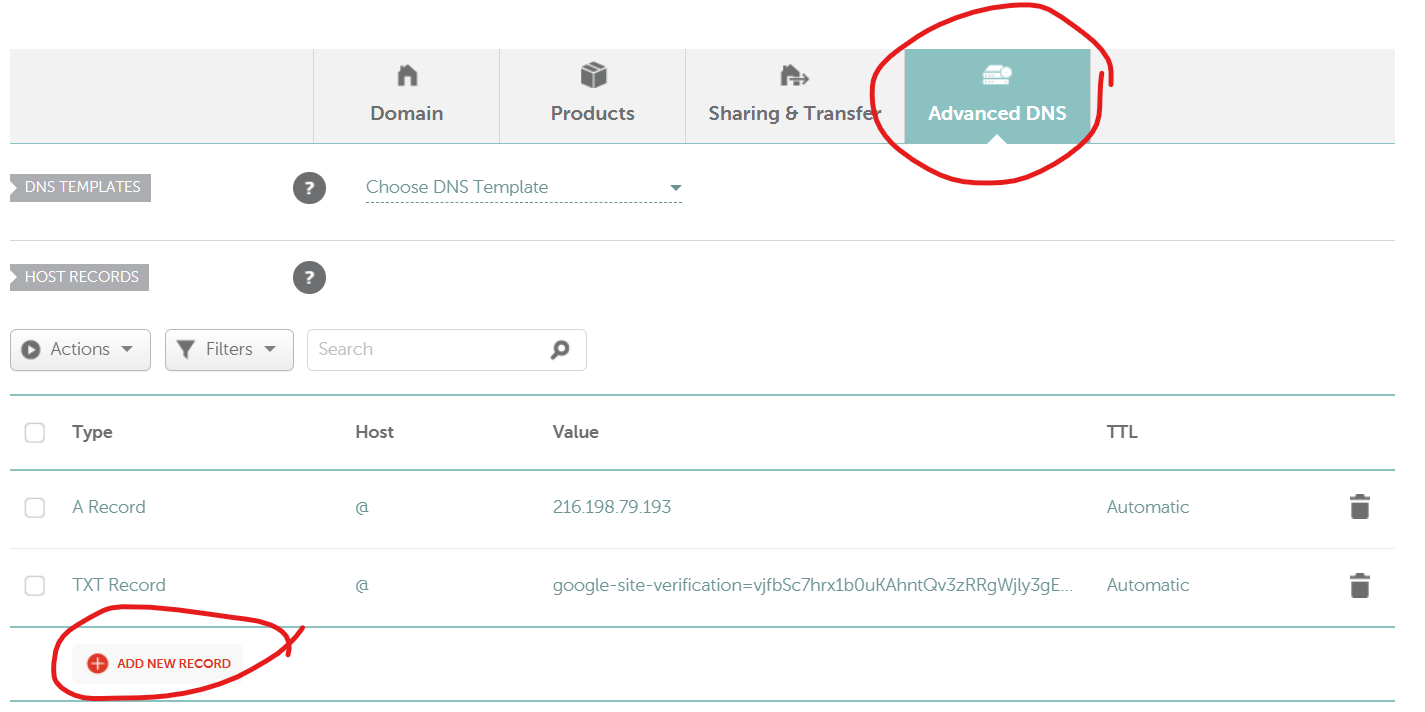
My setup looks like this (use the values your Vercel screen shows; they can differ by project and over time):
| Type | Host | Value | Purpose |
|---|---|---|---|
| A Record | @ | 216.198.79.193 | Points the root domain (pizzanote.dev) at Vercel |
| CNAME Record | www | The value Vercel shows, e.g. cname.vercel-dns.com. | Points www.pizzanote.dev at Vercel |
| TXT Record | _vercel | vc-domain-verify=... | Only when Vercel asks you to verify ownership |
| TXT Record | @ | google-site-verification=... | Google Search Console verification (add it when you need it) |
@in the Host field means the root domain itself; don't type the full domain name- Leave TTL on Automatic
After saving, wait a little, then click Refresh in Vercel so it can verify the domain. In my experience it took about 2 to 3 minutes. Vercel then issues the HTTPS certificate automatically.
Option 2: use Vercel DNS
In Namecheap's Domain tab, find Nameservers, switch from Namecheap BasicDNS to Custom DNS, and enter ns1.vercel-dns.com and ns2.vercel-dns.com. From then on, every DNS record is managed on Vercel's Domains page. Nameserver changes take longer to apply, sometimes a few hours.
www or no www?
Set up both, but pick one as the real address and redirect the other to it. Add both domains on Vercel's Domains page and set one to Redirect to the other (308). Search engines then index a single version instead of seeing duplicate content. This site uses pizzanote.dev without www.
Troubleshooting: Invalid Configuration won't go away
- Namecheap's default records are still there: a new domain usually comes with
CNAME www → parkingpage.namecheap.comand a URL Redirect Record pointing at a parking page. Delete them first, or they conflict with Vercel's records - Wrong Host value: use
@for the root domain andwwwfor www, notpizzanote.devorwww.pizzanote.dev - Not propagated yet: DNS changes take time. Check what resolvers currently return:
nslookup pizzanote.dev
nslookup www.pizzanote.dev
When the IP matches what Vercel asks for, click Refresh in Vercel again.
- "This domain is linked to another Vercel account": add the
_vercelTXT record shown on screen to prove ownership; you can delete it after verification - The HTTPS certificate stays pending: usually the DNS doesn't point at Vercel yet. Once the records are right, Vercel issues the certificate within minutes
That's the end of these notes. With the domain connected, you can add the site to Google Search Console. I cover the SEO side in Next.js SEO Notes.
About the author
Ewan (Pizza)
A web and SEO engineer who builds websites and improves search performance for clients in Taiwan and the US, and brings AI automation into the workflow.
More about me